
What Git Can Do
Git is a tool used for version control — it takes your files (code, images, or anything else) and creates “versions” of them. Not only can you go back to previous versions, but Git also makes it easy to collaborate with others by uploading your files to a remote server.
Getting Started with Version Control
The main organizational unit in Git is called a repository (or repo). For simplicity, you can think of one repository as one project — every project should have its own repo. On your computer, a repository is simply a folder where you keep all the files you want to track.
To create a new repository, open your terminal (or command line), navigate to the desired folder using cd, or create a new one with mkdir. Then, inside that folder, run the command git init. This command initializes an empty Git repository. You should see a message similar to Initialized empty Git repository in YOUR_FOLDER
Let’s create our first file — README.md (literally, read me). You’ll find this file in almost every software project; it usually contains important information about the project. Add a few lines about your team, for example who the members are.
Version control doesn’t happen automatically — you need to tell Git which files to track. First, you add files to the staging area, and then you create a commit, which saves the changes to the repository’s history. To add files to staging, use the command git add. You can specify individual files or entire folders. If you want to add all changes in the current folder, simply run git add . (The dot represents the current folder.).
After running the command, you probably won’t see any feedback — that’s normal. To check that the files were actually added to staging, use git status. You should see something like:
No commits yet
Changes to be committed:
  (use "git rm --cached <file>..." to unstage)
    new file:   README.md
Great — that means we’re ready to create our first revision. Each revision must be associated with a user, so we need to set up a name and email address that Git will link to your commits. For this, we’ll use the git config command:
git config --global user.name "Your name"
git config --global user.email your@email.cz
Because we used the --global flag, these values will be used as defaults for all repositories unless overridden.
To create a revision, use the git commit command. Each commit should include a short message describing what happened in that revision. You can specify the message using the -m option. For example, if we want to create a commit with the message Added README, we would run:
git commit -m "Added README"You’ll get an output similar to: 1 file changed, 3 insertions(+). Hooray! You’ve successfully created your first revision.
History
Each revision (commit) has its own hash — a unique identifier that allows you to find that specific revision at any time. If you want to display the history of your commits and their hashes, use the git log command. However, it’s often easier to view this information through a graphical tool (for example, Git integration in VS Code) or directly on the web (e.g. GitHub — more on that later).
Unwanted files
When developing web applications, there will be times when you’ll have files that you definitely don’t want to include in your repository. Whether it’s secret keys or a 600 MB folder with dependencies — that’s exactly what the .gitignore file is for. In this file, you list paths to files and folders that you don’t want Git to track. Once specified, the file will not be added to staging, even if you try to add it manually.
To save time and avoid figuring out what to exclude each time, you can use the tool Gitignore.io
Abyste si nemuseli pokaždé hledat, jaké všechny soubory se nemají nahrávat, existuje nástroj Gitignore.io, ve kterém si vyberete, se kterými technologiemi pracujete a dostanete hotový gitignore soubor. where you simply select the technologies you’re working with, and it generates a ready-to-use .gitignore file for you.
Note: The file must be named exactly .gitignore — with a dot at the beginning and no extension (no .txt, etc.). If you’re on Windows, make sure to enable the option to show file extensions and hidden files in File Explorer.
Collaboration and remote repositories
Git Isn’t the Same as Git(Hub)
While browsing the internet, you may have come across many services that start with the word Git. These services are usually related to the Git ecosystem, but they’re not directly created or maintained by the same authors as Git itself. One of the most popular services is GitHub. It allows you to back up your repositories to a remote server and, most importantly, collaborate on code with other people. Besides that, it also offers many additional tools for developers, but we’ll get to those later.
Once you’ve created an account, click the + icon in the upper-right corner and select New repository.
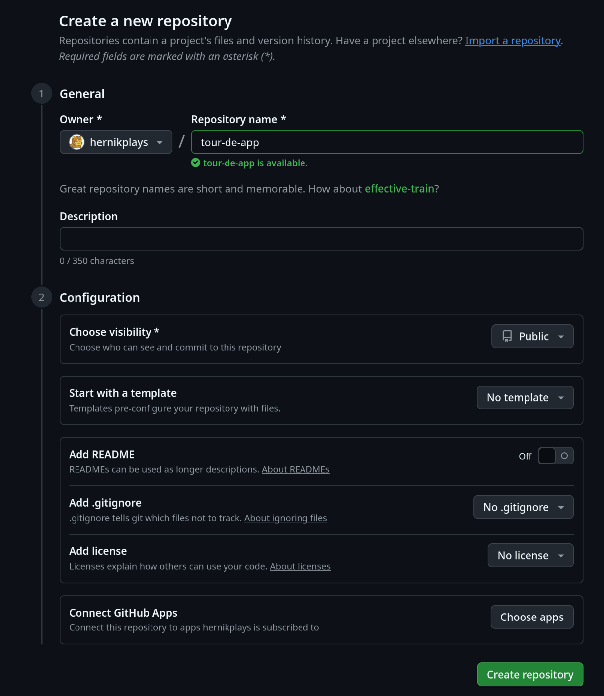
When setting visibility, choose private, so no one can view your code unless you grant them access.
Other settings can stay at their default values, so simply click Create repository.
Connecting and sharing
To upload new changes to GitHub, we need to add a remote repository (or remote) to our local one. The address of your remote repository is essentially the same as the web URL — for example, if your repository is visible at:
https://github.com/YOUR_USERNAME/YOUR_REPOSITORY_NAMEyou can connect it to your local repo with:
git remote add origin https://github.com/YOUR_USERNAME/YOUR_REPOSITORY_NAMEThe word origin here represents the default remote repository name. Now you can upload changes with the command git push.
You might encounter an error like current branch has no upstream branch, which means Git doesn’t yet know which remote branch to push your code to. To have Git handle this automatically, enable the option by running git config --global push.autoSetupRemote true and then use git push again.
Because you’re trying to upload changes, you’ll need to sign in so GitHub knows it’s really you. To make this easier, Git installs a tool called Git Credential Manager. If you kept the default installation options, it’s already installed and you’ll see a login prompt like this when you first push your code:
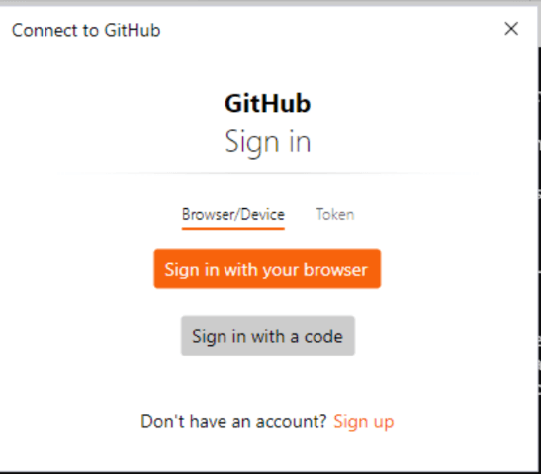
Here, simply choose the Sign in with your browser option and authorize the login in your web browser. Your login credentials will be securely saved on your computer, so you won’t need to worry about signing in again anytime soon.
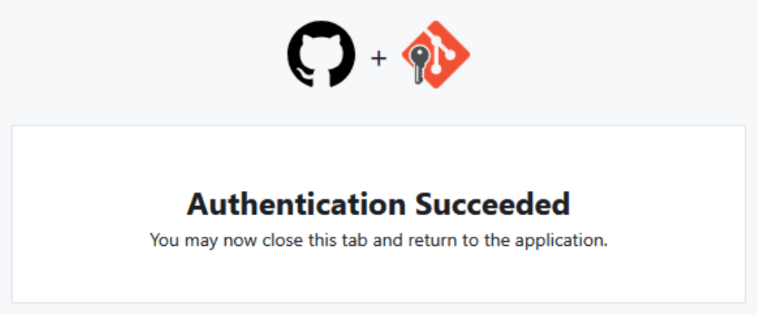
When you return to the terminal, you’ll see that the command has completed successfully. Now we can go to GitHub and take a look at our repository.
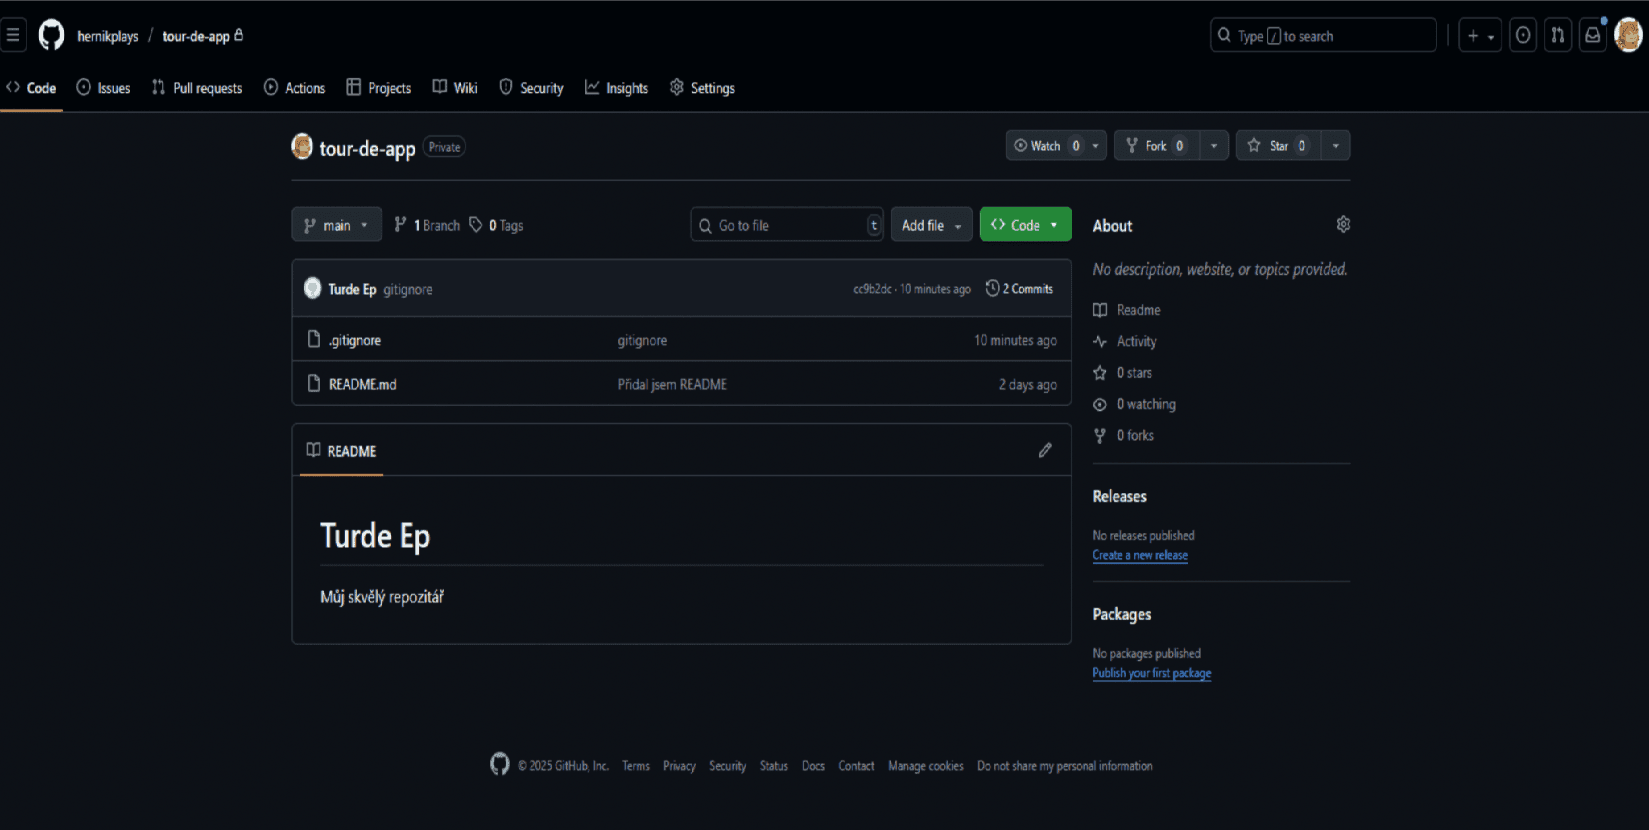
Look! Our files are here!
> Note: If your commits don’t appear under your GitHub account, you probably have your email set to private in your GitHub profile. GitHub links commits to accounts based on the email address, but if you prefer not to expose it publicly, you can use a private, GitHub-generated address. You can find this under Settings → Emails → Keep my email addresses private. It will look something like: something@users.noreply.github.com Once you set this email in your Git configuration (see the Getting Started with Version Control section), your commits will correctly appear under your GitHub profile.
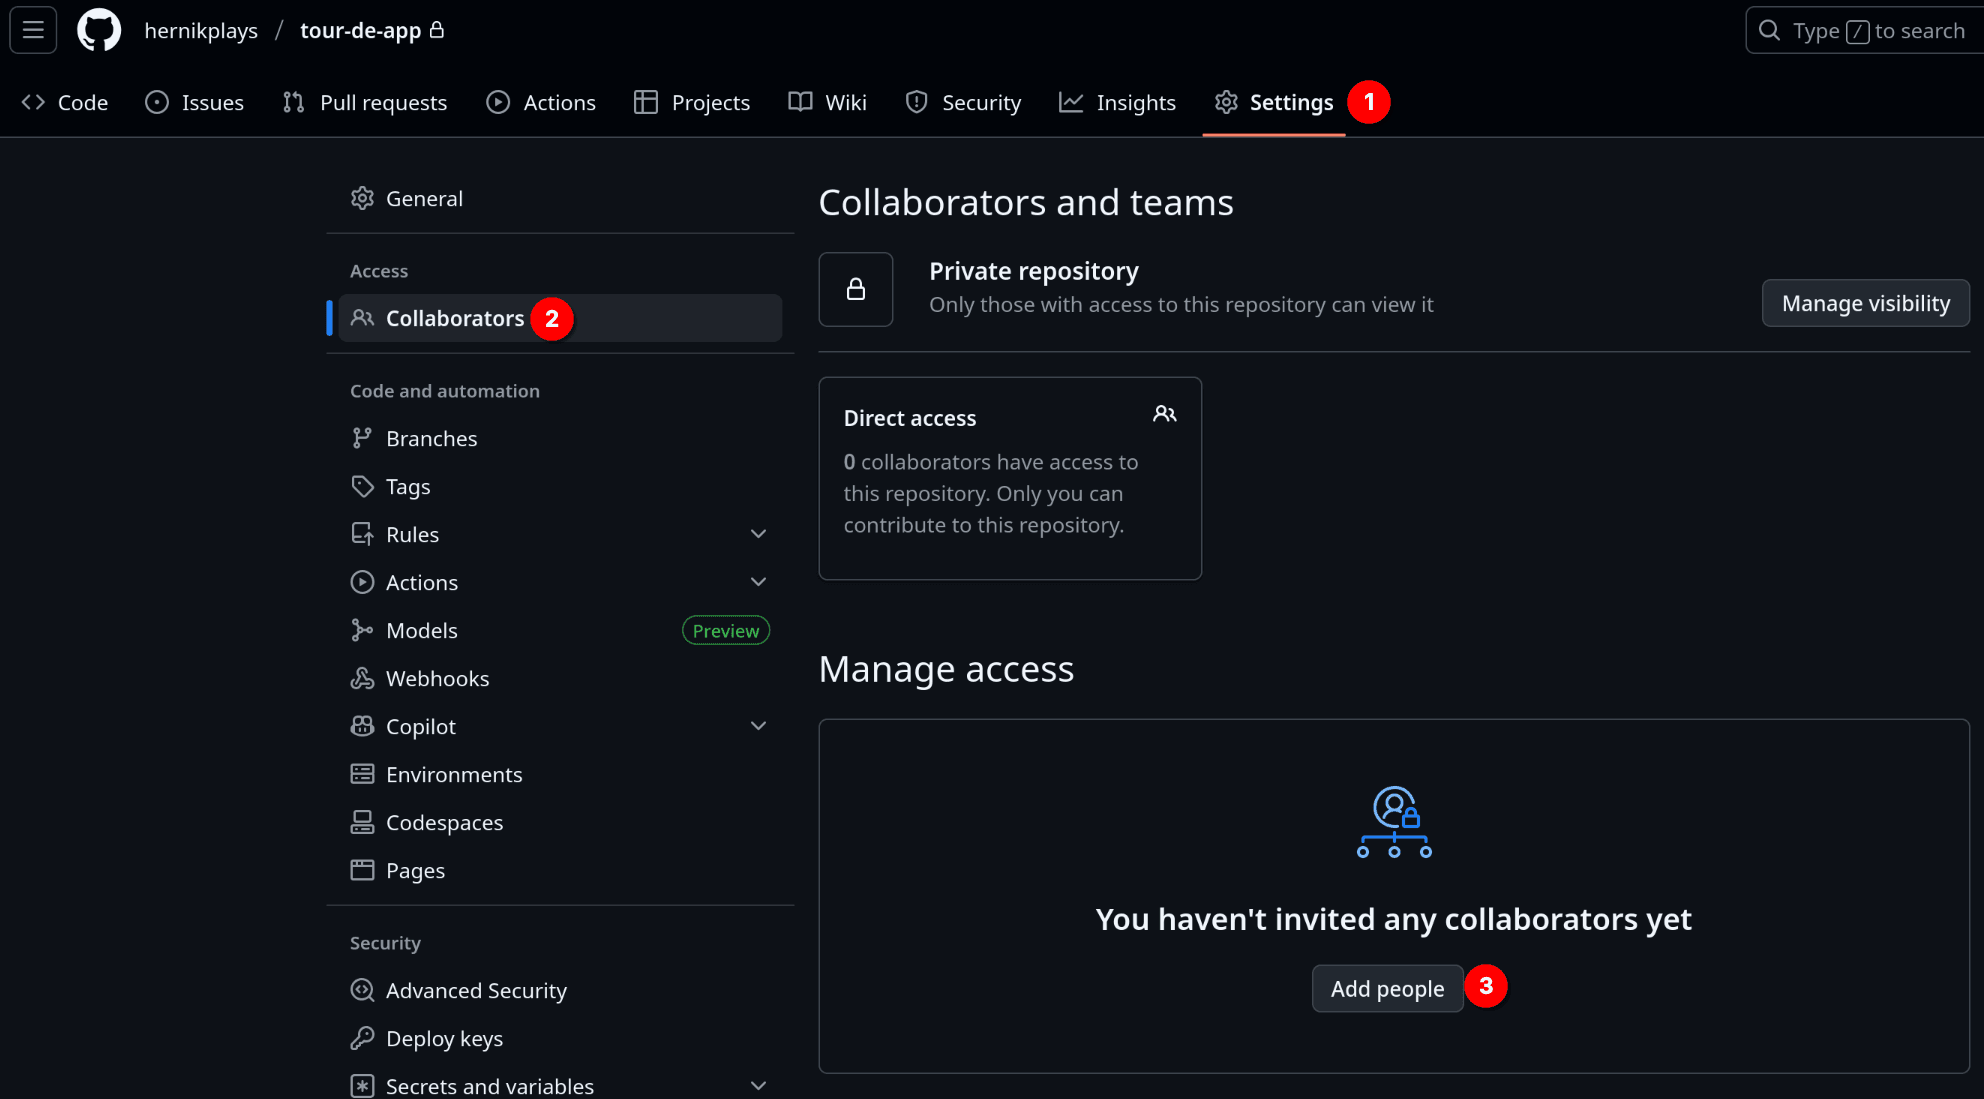
Finally, you’ll want to add other members of your team. At the top of the page, open Settings, then go to the Collaborators section and add the GitHub profiles of your teammates.
Once everyone receives their email invitation, they’ll be able to access the repository through it. Then they can clone it locally with the command git clone https://github.com/YOUR_USERNAME/YOUR_REPOSITORY_NAME.
Whenever you want to download changes from GitHub to your local machine, use git pull
Branching and Merging
As soon as you start working with other people, you definitely don’t want to be developing two features at once in the same place — that would quickly lead to a lot of conflicts (we’ll cover those later in the article). That’s why Git uses branches. Branches let you work on code in parallel without losing the original version. You can later merge these changes back into the main branch.
You can create a new branch using the command git branch NAME The new branch will be based on the currently selected one. For example, let’s name it cool-feature. You can view all existing branches with git branch --list. To switch to a branch, use git checkout NAME. Try creating a new file, add it to staging, commit it, and push it to GitHub.
When you open your GitHub repository, you’ll notice that the change doesn’t show up yet.
Instead, you’ll see a yellow label like in the screenshot — that’s because your change was uploaded to a different branch.
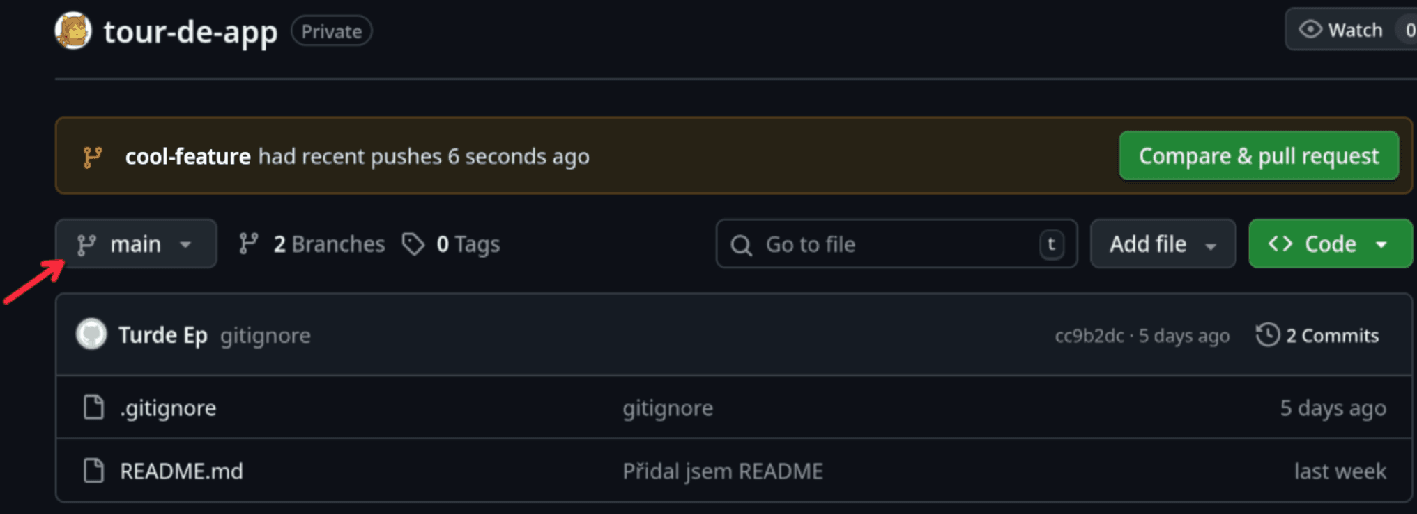
That means we’ve successfully uploaded our change to another branch. To view it, simply click the branch name shown in the yellow label, or open the branch dropdown menu (as shown by the arrow) and select it there.
Pull request
Now, when we want to bring our changes back into the main branch, we need to merge them. When working in a team, it’s best to use a pull request (PR) — a feature that lets others review your code before merging it. Pull requests are an online feature; Git itself doesn’t handle them directly.
In your GitHub repository, switch to the branch you want to merge. Below the branch selection, you’ll see information about how many commits this branch is ahead or behind compared to the main branch. To create a PR, click Contribute → Open pull request.
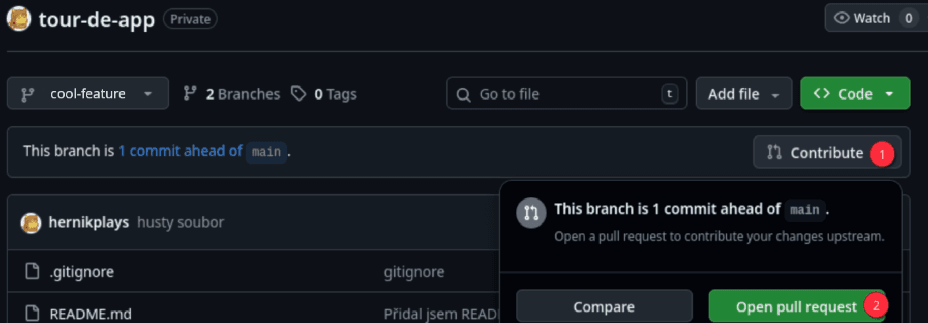
On the new page, enter a title and optional description, and on the right under Reviewers, choose people who should review your pull request.
If you later decide to add more changes to this branch, don’t worry — you don’t need to create a new PR.
Any new commits will automatically appear in the existing one.
Once you click Create, after a short moment you’ll see a green checkmark. That means your changes don’t conflict with anything that’s been updated on the main branch.
Next, we’ll take a look at what happens if two branches change the same file.
Conflicts
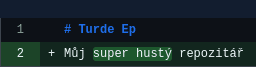
Let’s say someone on the main branch changed the README file to this:
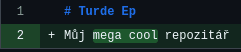
But on my cool-feature branch, I changed it to this:
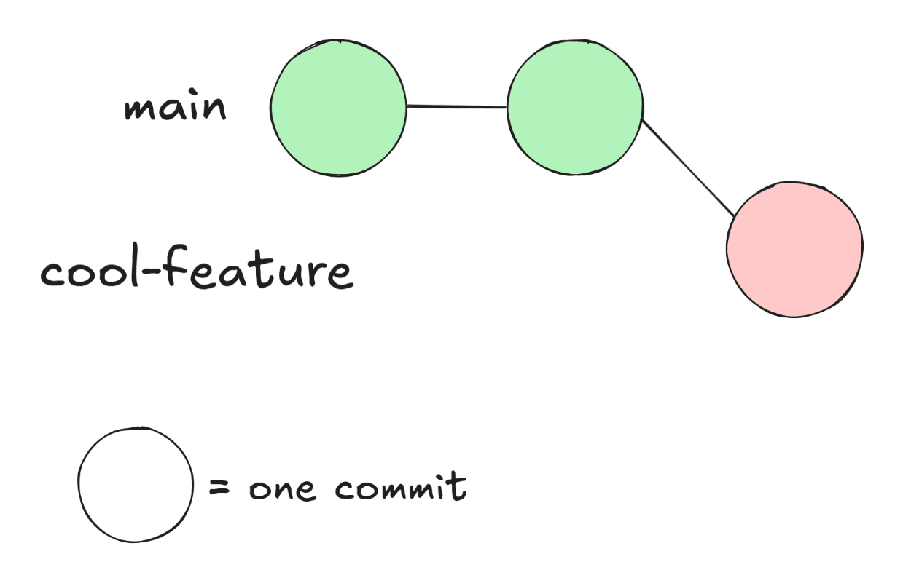
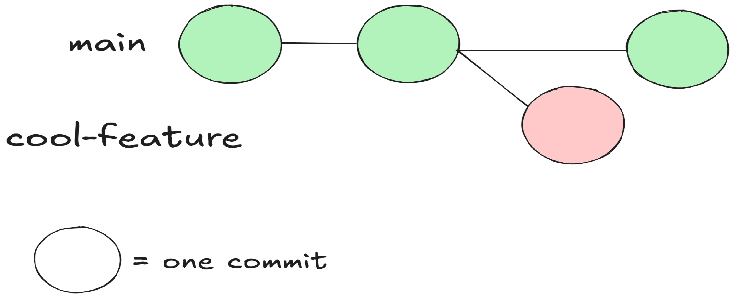
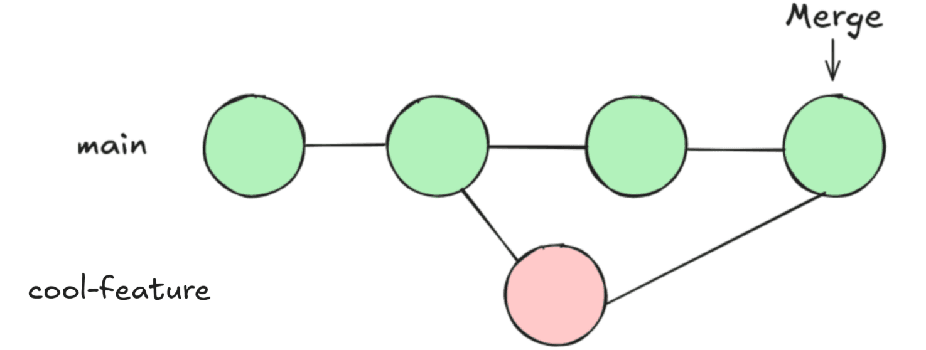
Our repository branches now look like this:
To merge the changes from the cool-feature branch back into main, we first need to include the changes that were made in main into cool-feature. When we look at our pull request, which we created a moment ago, instead of a green checkmark, we’ll now see the following message:
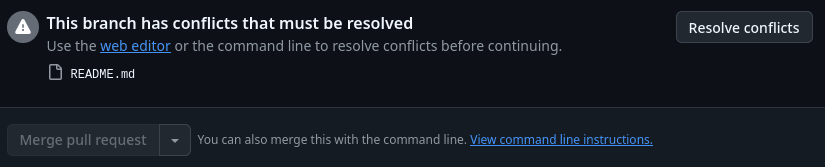
Because there are conflicts that can’t be automatically resolved without losing some changes, we’ll have to fix them manually. GitHub provides a web editor to help resolve conflicts, but in larger projects it can get confusing, so let’s take a look at how to resolve them locally instead.
Switch to your branch (using git checkout). Next, you need to fetch the latest changes from the remote repository using the command git fetch origin main. The first argument should be the source — in our case, that’s the remote repository named origin. The second argument is the name of the branch we want to fetch — in our case, main, because that’s the branch we’ll be merging from. Once the command completes, merge the changes from main into cool-feature with: git merge origin/main.
> Note: If we were to leave out origin/main and just write origin, Git would fetch changes from the remote repository but wouldn’t update your local main branch. You’d then have to manually update it using the git pull command.
Now your changes are up to date — and GitHub will once again show everything in green.

Now, if you merge the changes using the green button, the branching will look like this
Git commands overview
For better clarity, here’s a table summarizing all the commands used in this guide, along with their descriptions and examples of use.
| Command | Description | Example | Explanation of Example |
|---|---|---|---|
git init | Creates a new repository in the current folder | — | — |
git add | Adds files to the “staging area” for the next revision | git add folder/file.txt | Adds the file at the given path (here folder/file.txt) to the staging area |
git commit | Creates a new revision (commit) | git commit -m "Hello world" | Creates a new commit with the message Hello world |
git config | Allows you to change Git’s behavior and settings | git config --global user.name "John Doe" | Sets the user name that will appear in commits to John Doe |
git status | Displays the current state of the repository | — | — |
git push | Uploads local changes to the remote repository | — | — |
git clone | Downloads a remote repository to your computer | git clone https://github.com/YOUR_USERNAME/YOUR_REPOSITORY_NAME | Clones a remote repository from the address https://github.com/YOUR_USERNAME/YOUR_REPOSITORY_NAME |
git pull | Downloads new changes from the remote repository | — | — |
git diff | Shows the difference between your new changes and the current state of the repository | — | — |
© 2025 Student Cyber Games, z.s. – Released under the CC BY-NC-SA 4.0. license